Hi all,
It's been a while since I posted pictures of a game, but then again it's been awhile since I've played with my 15mm Sci-fi. However a couple of weeks ago, over Spring Break, I caught the painting bug and started pained my Khurasan Sci-Fi Soviets and a few more Exterminator miniatures to play the role of US Army troops.
Anyway, not long after painting the figures my son, Jeremy, dragged me to the local game shop to play some 15mm Sci-fi. The gamers at the shop are mostly card players so it was something different for them to see. I got a lot of questions about the figures and rules that I used.
This particular game was set in my world of Liberty and saw a mechanized platoon of Soviets clash with a US Army light infantry platoon. We used Stargrunt for the rules! Stargrunt! What a blast from the past. It's a nice, if clunky, system that plays well. I still think Tomorrow's War is better, but since I was gaming with Jeremy I decided to go with something simpler.
So to set the scene elements of the Soviet 85th Space Rifle Regiment have landed near the US city of Jagerville in northern Liberty. The Soviets landed near the aerospace port and cleared out scattered resistance. With the Americans in flight the Soviets started moving small mechanized forces toward the city to clear out any remaining American resistance.
For the Americans the Soviet landing was sudden and smashing. After a short, but ineffective, attempt to defend the aerospace port the remaining Americans fled to the city, leaving small rear guard elements to slow down the rapid Soviet advance.
The resulting fight was pretty bloody. Both sides scored a lot of hits and D6 light armor really isn't that great. Also suppression in this game can be very harsh. Placing supporting fires on the enemy can really limit their options.
We played for 2 turns and called it at that point... my wife needed me at home! So here's some of the action.


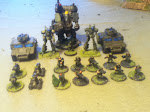
In this picture you can see the Soviet MBT with the survivors of the other Rockjumper. The T-555 Red Banner-U pretty much moved onto the board and sat right here for the rest of the game. He never even fired a shot. Instead he used his actions to pass orders and move other units. I shouldn't have placed the platoon commander in the unit's most powerful unit. Tbe CO should be passing orders in Stargrunt, not playing panzer jockey. That is what he did in this game and by doing so the he kept his most potent unit out of the fight. I might have to make another BTR the platoon/company command unit in the future.

More turn 1 action here. The BTR moved up to the dead Rockjumper and tried to knock out the sentry gun. He scored a hit or two on it and blasted it into atoms. It wasn't the best of ideas to place a sentry gun right on the enemies' avenue of approach. I should have put it off to a flank or something.

Another look at the US left flank. The Soviet commander is going over his plans!

A nice view of the gap that the Soviets had to move though. You can see both American strongpoints in this shot.
Anyway, the game ended at the end of turn two. The Soviets didn't exit a single vehicle. They were just too busy exchanging fire with the US strongpoints.
Not the best of games, but it was fun and we got to try out Stargrunt. It's definitely worth trying out again when we have more figures and time.
I have to give Khurasan thumbs up for their vehicles and troops. It was a lot of fun to paint them up and see them, finally, on the game board. I still have several more BMPs and BTRs to paint up along with another 40 or so motor rifles to go with them. Once they are done I'll have two full platoons of BMPs and BTRs (three vehicles each) and I plan to get a few more Red Banners to strengthen the force.
All in all, it was a nice time out with some excellent minis.
Time now Charlie Mike.